Part Characteristics: What Works and What Doesn't
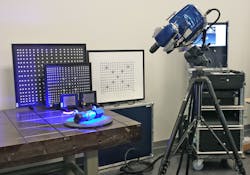
The first characteristic that will be reviewed is transparent parts. Some examples of this would be a glass bottle or a cookie tray. Structured light scanners rely on projecting a pattern onto the part and camera(s) capturing the pattern on the part to triangulate the contours of the object. If the light/pattern is transmitted through the material and the camera(s) will not be able to capture the pattern on the external surface. Similar issues occur when the object surface is very shiny and reflective. The light and pattern of the scanner will be refracted or reflected causing very noisy data especially in the internal corners of parts. In some cases, ambient light and other lighting will affect the data capture as well.
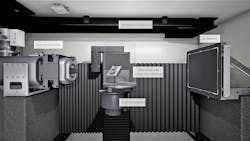
CT scanners do not have issues with any of these types of problems. The density of the material(s) is more a factor with this type of scanning rather than the finish or transparency of the part. Clear plastics and glass are actually very easy to scan with a CT scanner due to the density of glass and plastic to be quite low. Polished and machined surfaces also don’t have issues with CT scanners as long as the CT scanner is powerful enough to penetrate the part.
Parts Size and Portability
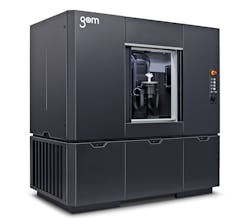
One limitation on CT scanning has to do with the amount of power needed to penetrate the part. For denser materials and larger parts, this is where structured light may be a better option. Certain materials like lead, platinum, and gold are examples of very dense materials that would need to be smaller in size to work well in a CT scanner or would need a very powerful machine to penetrate the part. In this case, structured light may be best since the density of the material is not a factor in capturing data. Industrial CT scanners are commonly lead-enclosed cabinets or concrete rooms. So, if the part is too large to fit in the room or cabinet it is also not a candidate for CT scanning. Many parts are too large or heavy to be transported to the CT scanner so having the ability to take the measuring device to the part can be an advantage also. Structured light scanners are very portable and can be taken to shop floors and many other environments where it makes sense to bring the measuring device to the part that needs to be measured.
One major advantage of CT scanning is that it can capture internal features that can’t be seen when looking at the part. Structured light scanning is what we call “line of sight” scanning. What this means is when moving around the part or spinning the part around in your hand if you can see the surface(s) or details then structured light won’t pick the data up as the part sits in its current state. Again, with CT scanning the X-ray penetrates the object and gets internal surfaces that cannot be seen without disassembling or cutting the part. In many cases when parts are disassembled their shapes change along with some interferences that may be causing issues with the part are released and would not be found trying to scan then individually. In addition to getting internal surfaces, you can also look at the internal structures of the part as well. In fiber-filled materials, the fiber orientation and distribution can be captured to help run different structure analysis for how the part will hold up under force or pressure. For casting and injection moldings, voids and defects can be found to verify the part will not break under load or any additional processing on the part will not be affected by these defects. Many of these types of internal inspections will allow “bad” parts, not just dimensionally, to be pushed to the customer/consumer or to the next process of production.
Multiple parts can be placed into the CT scanner and scanned in one volume to help increase throughput. One CT scan can have as many parts scattered throughout the volume that allows the x-ray to penetrate all of the part and hold an allowable resolution of the data. In most cases, the resolution for CT scans varies by the volume size of the CT scan and the power needed to penetrate the materials of the part(s) in the scan. With structured light, the resolution is fixed for each field of view (Scan Volume). Some structured light systems have multiple FOVs and the resolution changes for each of these scan volumes. A smaller FOV can be used to keep a tighter resolution but many more scans will be needed to capture larger parts. In some cases e.g., larger parts that don’t fit into CT volume or very dense materials that cause the CT scan resolution to be higher than required; would make structured light scanning the optimal for the application.
Costs
In most cases, a structured light scanner will cost less than a CT scanner. The maintenance/upkeep costs for the CT scanner will also be higher. With that being said this is normally why service work provided with CT scanners is also normally higher in cost due to the larger cost of the equipment and maintenance costs. If cost is an issue and the advantages of CT scanning isn’t necessarily needed that structured light may be the correct solution.
Some quick similarities for CT and structured light scanners are that both can and are being used today in a production line for in-line inspections. Both can be paired with other devices/software to become very automated with none to very little human interaction. This helps keep throughput consistent and measurement consistency throughout the process.
In closing, there are a lot of advantages to each type of scanner but many parts fall into both types of scanners. Looking at some of the finer details may cause you to lean one way or another. If not, try both and see which works best for you. Similar to why Exact Metrology offers and uses so many different scanners and software because there is not one system out there that will do everything. Depending on part/environmental characteristics, inspection requirements, and many other factors, certain scanners will work better or not at all.


