Artec Eva Crushes Inaccuracies at Finnish Manufacturing Company
When mining equipment manufacturer Element was founded in 2017, it was clear to them that efficiency and accuracy needed to be the cornerstone of their business. An international manufacturing company for spare parts and replacement pieces as well as a service provider, the company was started by mining experts from Russia and Finland. Today, the team has grown to include 89 employees, and their sales and partnerships extend from Russia to China, Finland to Kazakhstan, Eastern Europe to Scandinavia.
But through changes, developments, and expansion over the years, one thing has stayed the same: Element Mining has always used scanning technology in their work. Namely, Artec Eva.
A structured light 3D scanner that provides quick, accurate, and textured models, Artec Eva works best with medium-sized objects and for capturing precise measurements in high resolution. A great solution for all sorts of objects—including shiny and black objects, which are notoriously difficult to scan—Eva suits a wide range of industries, from automotive to medicine, with its vast capabilities, from reverse engineering to quality control.
And since the start of the company, Element Mining has never looked back. “As a tech start-up, we decided to invest in modern technology from the very beginning,” Production Director Sergey Kolesnikov says. “We’ve never worked without scanning technology.”
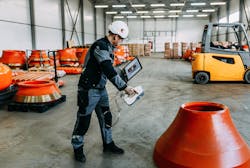
At the frontline of these operations is scanning engineer Alexander Slatvickiy, who has been using Eva since he began working for Element in 2018. For him, starting to scan was a straightforward journey. “The training was quick and easy, thanks to how convenient using Artec Studio was,” Slatvickiy says. “Because of that, I was able to scan on my own after just two days of practice under the supervision of my mentor.”
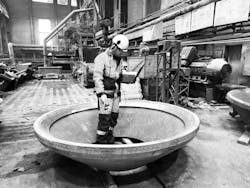
The main purpose of their scanning is quality control, says Kolesnikov. For example, scanning is used to ensure the precise measurements of the mantles of cone crushers, a key type of machine used in mining and ore processing.
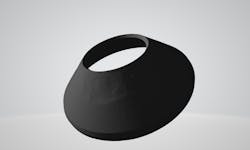
Produced by a sand casting method, the mantle featured here is made of Manganese Steel, an alloy discovered in 1882.
The manufacturing process usually takes a couple of weeks. Once the parts are ready, samples are taken out for accuracy testing.
“First, we scan all surfaces of the sample with Artec Eva,” Slatvickiy says. “And with Artec Studio, no surfaces are missed, as scanned surfaces are displayed in real-time.” Next, a polygonal model is created in Artec Studio. Excessive surfaces from surrounding objects are erased before global registration and merging, and tools are implemented to create an STL surface model. This model can then be used for quality control in Geomagic for SOLIDWORKS, where new models are compared to models of original parts, or to highly accurate drawings.
“We plot the sketches per section locations and use SOLIDWORKS tools for measurements,” Slatvickiy explains. For this task, the advantageous features of Geomagic are the Deviation Analysis tool applied for visualization of deviations of polygonal models from the nominal profile, and the Orient Mesh tool to ensure the basic planes of the polygonal model match the basic planes of the solid model.
The entire process from scanning, processing, and modeling, to comparing takes no longer than four hours, and in some cases is as fast as 30 minutes.
Alexander Shestakov from Gold Certified Artec partner Globatek says that Artec Eva is the ideal solution for this process, where highly accurate scans are captured in mere minutes. “Whether it is a warehouse complex or the territory of a mining enterprise, some of Artec Eva’s defining characteristics—its lightweight and ease of use—allow you to work up to six hours in a mobile mode, in compliance with all requirements for digitization accuracy.”
To meet the high standards (ISO 9001) of quality the company provides, two types of issues need to be looked into: Critical issues such as high inaccuracy, and non-critical issues that can be resolved post-production. “We reject parts if our scanning report indicates an occurrence of critical issues,” Kolesnikov says. “If not, we’re usually able to make some changes to eliminate non-critical issues through collaboration with our suppliers.”
“To meet our standards, we need measuring inaccuracy of not more than 0.0001%,” Kolesnikov says. “That means in a 1,000 mm, or 1-m diameter, there’s less than 0.1 mm room for error.”
Beyond that, Element also uses Eva to scan worn parts for their customers—they are then able to scan worn parts and ensure their precise restoration.
Beyond a job well done, it's the ease of use and accuracy that scanning brings to the process that Element’s engineers most enjoy. “Most of all, I like the scanning process,” says Slatvickiy. “I also like the ability of Artec Eva to work on battery power, the convenience of scanning and post-processing software Artec Studio, and the accuracy of scanning.”
“Using Eva for quality control allows you to guarantee the customer high quality of delivered products,” Shestakov adds, “As well as to minimize logistic costs that would’ve been incurred when returning large equipment.”


