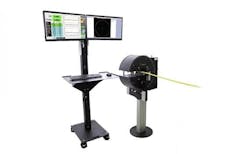
FlawSense Online Inspection and Measurement System
A system for high-speed online inspection and measurement, FlawSense allows users to detect surface defects of high specification tube, pipe, and wire & cable and corrects the process to eliminate these defects by tracking. Knowledge of the type of defect from the 3d image makes it a powerful diagnostic tool to identify and correct the process problems causing the defect. It also can provide highly accurate measurement of tube diameter and ovality more accurately than laser micrometer systems and camera vision technology. The data is visualized in TotalVu, LaserLinc’s graphical user interface.
The total in line solution consists of at least three laser sources symmetrically disposed about the tube, pipe or wire. The laser beams pass through optics to project a linear array of light; a CMOS array sensor collects light reflected, providing multipoint measurements of triangulation across the field of view of the laser and allowing a profile to be computed using algorithms and point cloud data manipulation. The camera enables detection of very small defects portrayed as a 3d image. The high-resolution laser technology allows flaws only 0.0002 in. (5 ?m) across to be detected.
Capturing more than 10,000 frames per second, FlawSense takes a 360-deg. view of round products, capable of identifying slits, cracks, pits, bumps, blisters, lumps, scratches, neckdowns, wrinkles, and braid breaks in composite products. Demanding end user application include medical, aerospace, and automobile fields.
- 360-deg. orientation-independent flaw detection
- 360-deg. orientation-independent OD and ovality measurement
- 100% non-contact, real-time inspection ? inline or offline
- Up to 10,000 profiles per second for thorough coverage
- Automatic system setup
- Press a button and let the system optimize for your product
- Minimal operator interaction required
- Record detected flaws
- 3D playback and visualization
- Log information related to flaw length, height, and location
