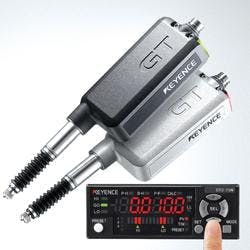
GT2 Digital Contact Sensor Introduces World’s First Scale Shot System
The 2nd generation KEYENCE GT2, “All-in-One” contact digital sensor, adopts the world’s first scale-shot system to provide the highest precision in its class (0.1 µ resolution, 1.0 µ accuracy). Maintaining the “No Error” feature from its predecessor, no data will be lost due to rapid spindle movement during production lines and other high-speed applications.
All measurement is performed in the compact GT amplifier, requiring no PLC or external data processing.GT2 sensors are tough and rugged, and the cable’s IP67 water-resistant enclosure rating helps prevent or reduce swap-outs in select harsh environments.
The sensor head cable uses a flexible robot cable that can withstand continuous bending up to 6 million times at a radius of 50 mm (1.97 in), and can be cut anywhere to length. Linear ball bearings covered by a strong rubber casing protect the spindle to ensure a long service life by eliminating wear and abrasion damage. Detecting durability extends up to 20 million times.
Simple tolerance setting at the touch of a pushbutton reduces the number of steps compared with conventional models. A variety of displays, brackets, and mounts (DIN-rail, compact panel, large display panel, and pulse output) are available to accommodate user needs to simplify amplifier installation and setup. Large indicators on the display are convenient for setting up several units, and also helpful to determine OK/NG connections at a quick glance.
A single unit can connect up to 11 sensor heads for a space-saving, compact installation. When several amplifiers are connected, the GT2 Series enables automatic calculation simply by selecting a calculation mode.
Versatile detection modes support all applications, such as measuring the degree of flatness, thickness, warpage, twist, maximum, minimum, and average.
The analog I/O card used with conventional sensors is not required for the GT2, which further reduces labor time and total cost. Equipment status can be quickly checked by looking at the bar indicator that displays green when the data is within its limits, and red when the values are out of spec.
